
How to Configure Email on Android Devices (Smartphone, Tablet)
Depending on which version of Android your device is running, the screens you see may look slightly different. If you are having difficulty, please call us at (303) 539-9397, and choose option 1 for support.
Step One:
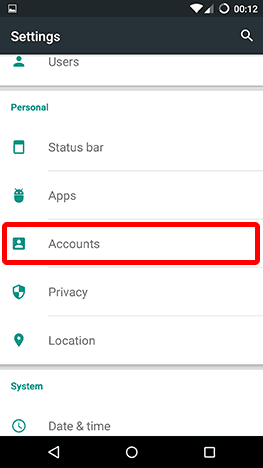
Find the settings icon, and tap it. It will look something like this:
Step Two:
You should now be inside the Settings app. Tap on Accounts, which should be under the Personal section:
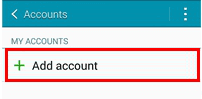
Step Three:
You should now be inside the Accounts section, which will list any existing accounts you may have already configured on your device. Tap where it says Add Account. It will look like this.
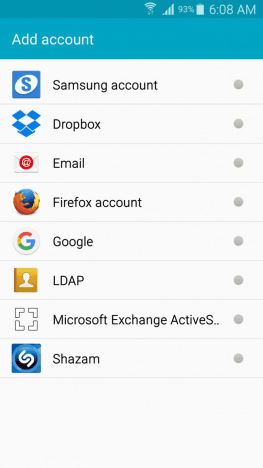
Step Four:
You should now be presented with a list of options to select what type of account you want to set up. Tap Exchange or Corporate.
Step Five:
Your device will now ask you for your email address.
Please type in your email address.
Once you have entered that information, tap Next.
Next you will be asked for the password for your email account. Please type in your password.
Please note that the password is case sensitive
.
Once you have entered that information, tap Next.
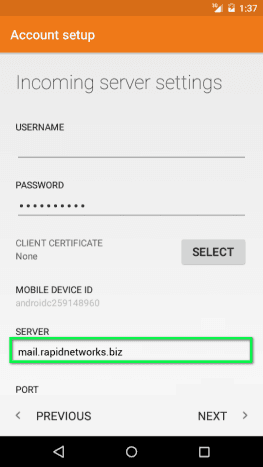
Step Six:
Now your device will ask you to enter the incoming email server settings.
For Username
, enter your username, which is the part of your email address before the @ symbol.
The Password
field should already be filled in from when you entered it in the previous step.
If it asks about a Client Certificate
, leave it set to None.
For Server
, enter: mail.rapidnetworks.biz
Port
should be set to 443.
Security Type
should be set to SSL/TLS.
Then tap Next.
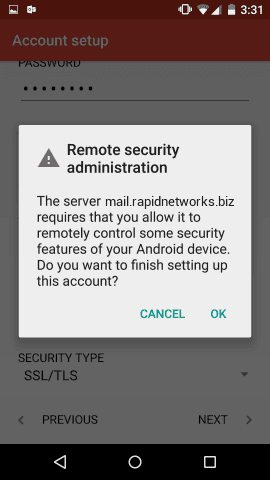
Step Seven:
Your device will now tell you it is verifying settings for a few moments, and then it will pop up a "Remote security administration" notifcation. This setting is required in order to connect to the server, and will enable us to remotely lock or wipe your device in the event it is lost or stolen.
Tap OK.
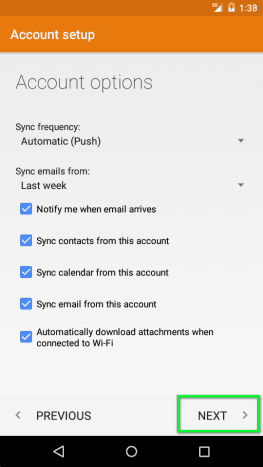
Step Eight:
You will now see a screen entitled "Account options." From here you can choose how frequently you want your device to check for new emails, as well as other options. We recommend you leave all of the setings at their defaults - unless you do not want to sync calendars or contacts for this account, in which case you should uncheck those settings.
Step Nine:
Your device will tell you - "Your account is set up" and give you an opportunity to name the account. You can leave the default name in place, which is simply your email address, or change the name to any name of your choice.
When you are done, tap Next.
Step Ten:
All done. Click your Home button to return to your main screen, and go into the Mail app to use your email account.